Explorer’s Guide to Impact Craters
Barringer Crater Tour
- Getting to Barringer Crater
- Virtual Tour of Barringer Crater
- Barringer Tour: Visitor Center
- Barringer – Stop 1
- Barringer – Stop 2
- Barringer – Stop 3
- Barringer – Stop 4
- Barringer – Stop 5
- Barringer – Stop 6
- Barringer – Stop 7
- Barringer – Stop 8
- Barringer – Stop 9
- Barringer – Stop 10
- Barringer – Stop 11
- Barringer – Stop 12
- Barringer – Stop 13
- Barringer – Stop 14
- Barringer – Stop 15
- Barringer – Stop 16
- Barringer – Stop 17
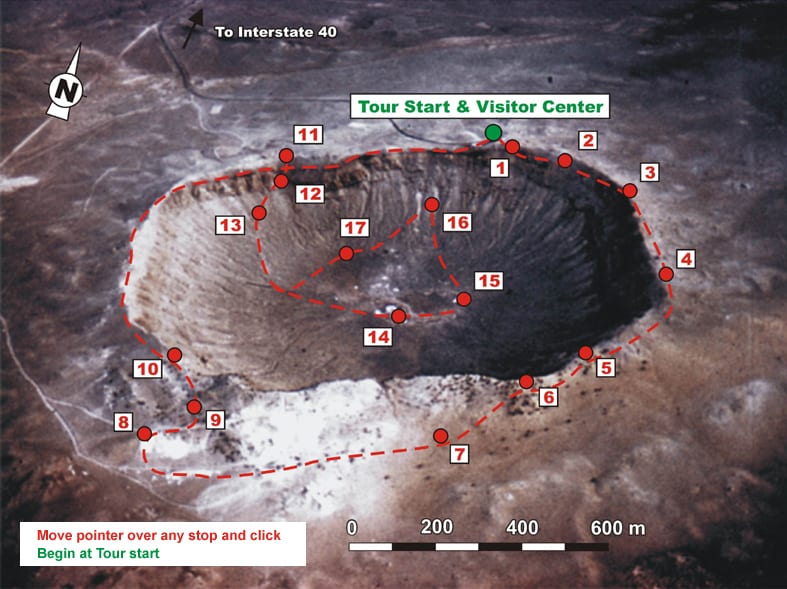
Stop 5 at Barringer
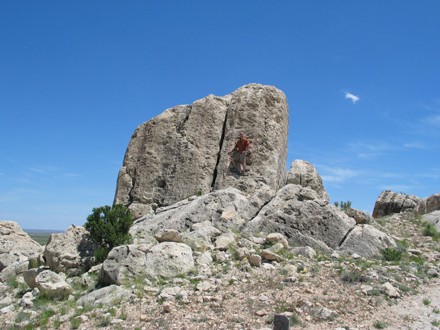
“Whale Rock” near the east rim trail
Photo: G. Osinski, University of Western Ontario Location: Southeast corner of the impact crater along the east rim trail
Scale: Height of the person is approximately 1.5 meters
The large block in the photo to the left is known as “Whale Rock”. It was excavated from the interior of Barringer Crater during its formation. Note the person for scale.
Until now, most of the ejecta we’ve seen has been relatively small fragments of rock, up to a few tens of centimeters in size. At Stop 5 we can see some huge blocks of Kaibab Formation that were thrown out of the crater as part of the ejecta blanket. Imagine the energy required to throw a block of this size out of the crater!

View looking north along the crater rim
Photo: G. Osinski, University of Western Ontario Location: Southeast corner of the impact crater along the east rim trail
Scale: Width of the larger rocks in the foreground are generally a few meters
Geologist Gordon Osinski at “Whale Rock”