
As we head down the Caretaker Trail, there are some excellent examples of the structure of Barringer Crater, including the overturned rim and a large tear fault .
| View of the Overturned Rim Photo: G. Osinski, Canadian Space Agency Location: Below the northern rim of the impact crater Scale: As at Stop 2, the Kaibab and Moenkopi formations have been uplifted, peeled back, and redeposited on top of each other. | 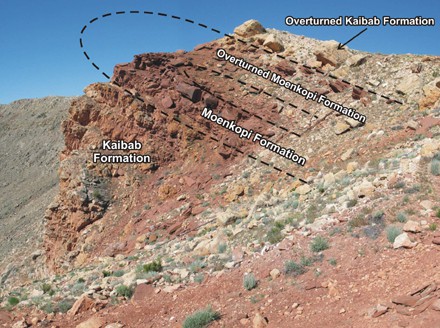 |
| Tear Fault in the Crater Rim Photo: G. Osinski, Canadian Space Agency Location: Below the northern rim of the impact crater Scale: Slightly further down the trail, we can see one of the many large tear faults that occupy each of the four corners of the crater which give it its squarish rim shape. As the rim was being overturned, the tear faults formed along fractures called joints that existed in the rocks before the formation of Barringer Crater. On the left side the fault in the above photo, the rocks were uplifted more than on the right side. | 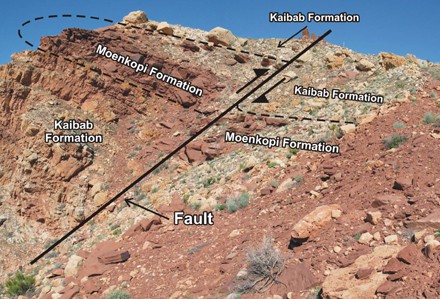 |
| Media: Geologist Gordon Osinski talks about overturned layers. | View or download media file (.mp4) |
| Media: Geologist Gordon Osinski talks about tear faults. | View of download media file (.mp4) |